

The hallway linen closet was what I would consider one of my first projects in the DIY space. I had been watching videos, following DIY content creators, and daydreaming about using power tools for a while prior to this project, but always felt too nervous — those miter saws look easy to use when it’s someone else doing it, sped up for social media, noise removed with a catchy background song to fit the aesthetic video that shows up on their feed. Turning it on and feeling the power behind it was humbling to say the least. However, when that third trimester hits and nesting for your first child gets really real, you decide that your home needs more functionality to help your brain feel calm to bring home that little bundle of joy. As calm as it can feel bringing home a newborn…but I digress.
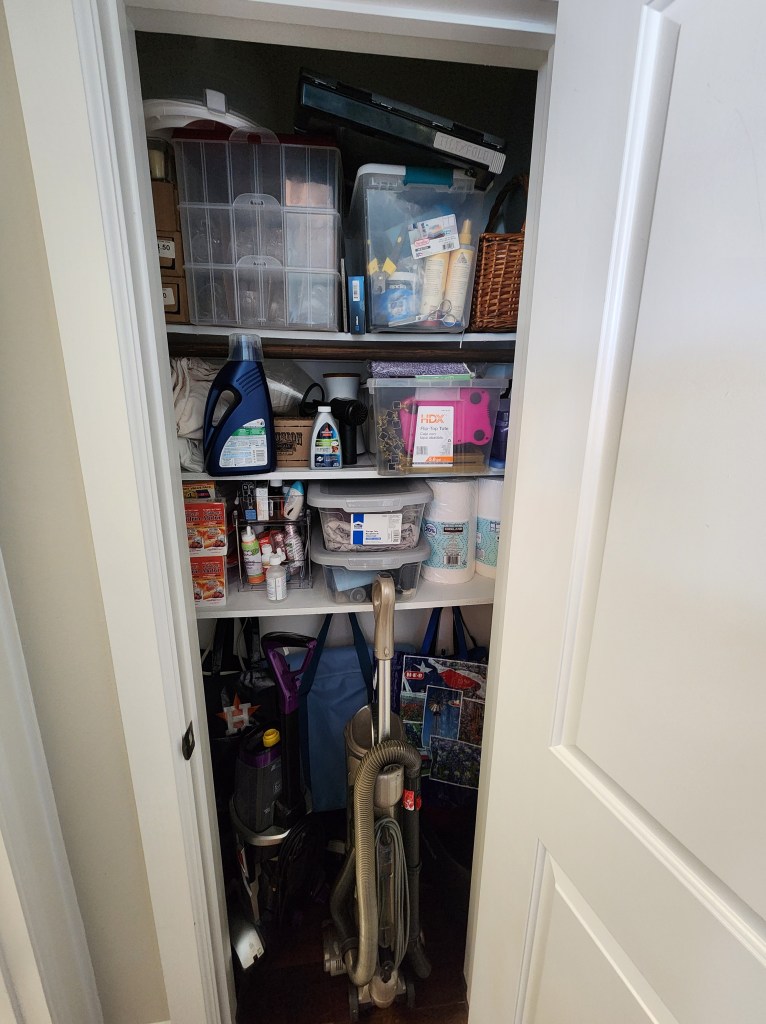
The closet next to our laundry room was built to be a coat closet. We live just north of Houston, where no one wears coats because 80% of the year it’s pretty warm, and the closet is located at the back of our home, away from where guests would be dropping off a jacket or purse. The intended function nor the location in our home made any sense, so I set out to make it work for our growing family. There wasn’t a designated place to store our upright vacuum, floor cleaner, chemicals, extra rolls of toilet paper, etc. Honestly, why these “family” homes don’t come standard-equipped with bulk store storage is beyond me — a Costco closet is something of my dreams!
We started by cleaning the closet out and getting rid of things that were thrown in there over the years, never to see the light of day again. Once it was decided what was staying, I got to work designing (using this term very loosely here) how this closet would be re-assembled to make the most sense for our family in this season of our lives. We needed sturdy shelves and small-ish storage totes, with shelves starting at the height just above a vacuum handle. As I’m writing this, I’m making mental notes of all the things I would do differently now looking back on the project and how we use this space.
At the risk of oversimplifying things, I had some 3/4″ MDF laying around my garage and some semi-gloss white paint. I measured the length and width of the inside of the closet to determine the size for my shelves, cut supports, painted everything and then screwed the supports into the studs and laid the shelves on top of each set of supports, securing them from the top down with screws. Once everything was dry, we moved everything back into the closet and I immediately felt three things: a sense of calm that this one small space in my home had been brought to order, a sense of pride that I conquered my fear of a saw and did this myself, and an itch to do it again, and again, and again in all areas of my home.

Reflecting on this project, I will likely go back and modify a few things with new skills and ideas of how to optimize the space once again. Things that I would change and a punch-list for when I circle back to this one…
- Add an outlet inside the closet to charge cordless cleaners
- Make the shelves adjustable using shelf pin holes (think: inside of a cabinet shelving)
- Modify the shelves to be the depth of the closet instead of leaving room in the front for things to fall
- Add shallow shelves on the bottom to utilize every inch of space
- Remove the builder-grade shelf and hanging rack that I left in there the first time — nothing has been hung in there since I first put in shelves and honestly, the bar just gets in the way
- Make the shelves more aesthetic – personally, I am more motivated to keep clean things that I think are pretty! Shallow, yes. True, also yes.
- Add motion sense LED lights for visibility (this closet is outside of the laundry room but also in a dark corner with a return air vent above, so no place for a ceiling light)
What I learned from this project:
- Walls aren’t straight and closets aren’t square.
- Even after implementing functional storage solutions, reality is that my house (and my guess is most people’s homes) will never look like it was pulled from a page in a magazine, and that is OK! It simply needs to work for me and my family.
- Just START somewhere. You can always go back and change or fix things because you know how it was built!
