We lived in our home for about 5 years before fully deciding what to do with the living room. I recommend living in a space for a minute before tearing down any walls because needs and style will evolve as you settle into a space. Since moving in, my husband and I got married and subsequently had a child who would be turning two right at the end of this project. Our living room was filled with furniture that didn’t fit the scale of the room and band-aids for how we use the space.
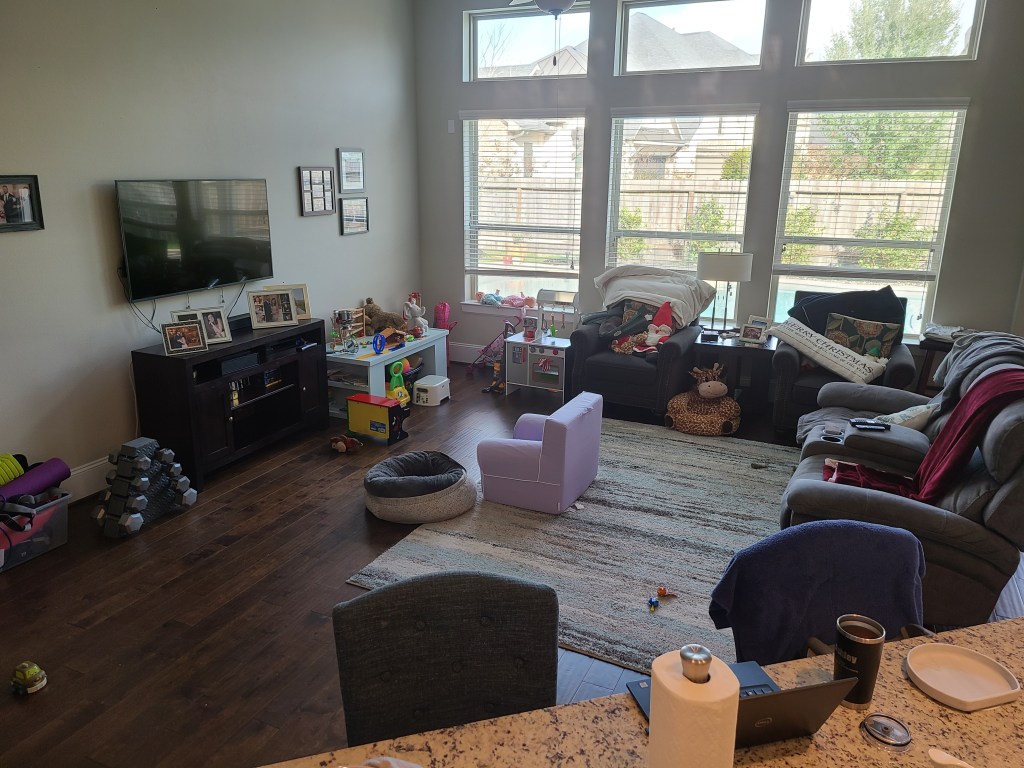

Above are the “before” photos — small-scale, piecemeal furniture and less than cute storage solutions in a medium to large-scale room with lots of natural light and a big, near-empty wall. Please don’t judge our workout equipment that was kept in a storage tote next to the TV console for far longer than I’m proud to admit.
When we had our butler’s pantry-style cabinets installed as an extension of our kitchen, in the breakfast nook area, I had an interesting conversation with our cabinet builders. Not unlike many conversations that I have with professionals, it was empowering — I vividly remember them telling me, “building cabinets is easy, it’s just boxes”. I’m sorry, WUT?! He had to be crazy, right? The takeaway from the conversation for me wasn’t that it was easy, but that so many people don’t even try. Challenge accepted! There are way too many areas of my home where I dream of built-ins and I admittedly am too cheap to hire out every single job. He challenged me to build the cabinets for my laundry room and I was all too eager for the task.
Every year on our wedding anniversary, my husband and I daydream about what we want out of the next year of our lives, and on our anniversary in 2021 was when we landed on the living room. After building the laundry room cabinets, my confidence, and skills, we decided it was time to budget for and make a plan for the living room built-ins.

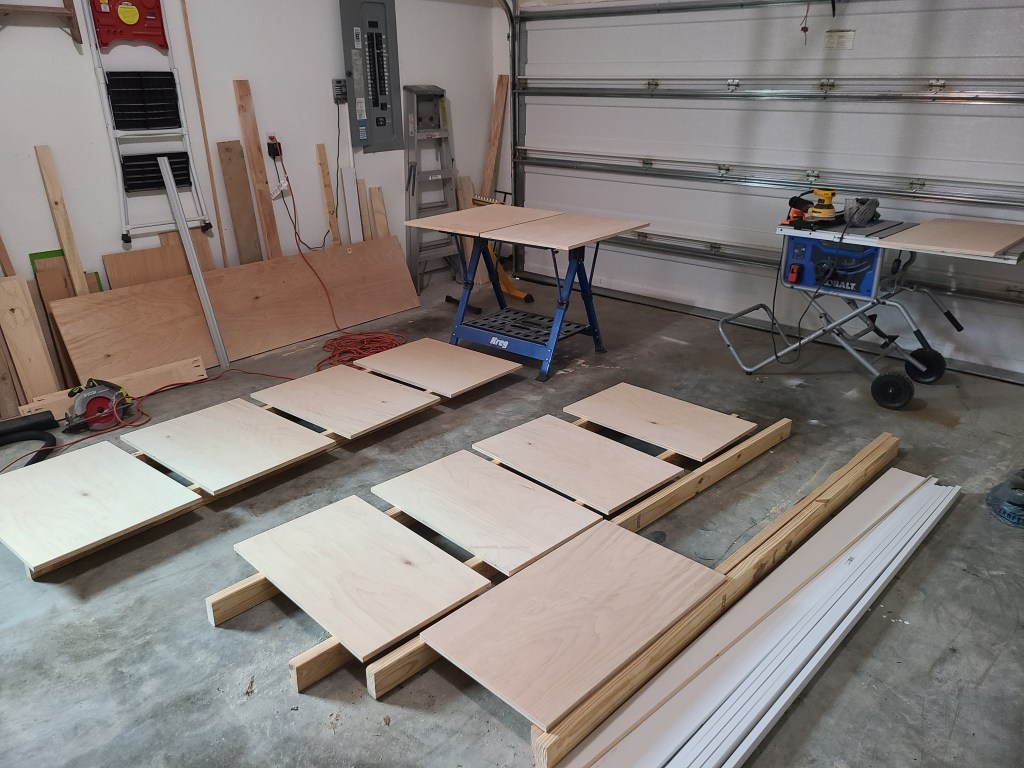
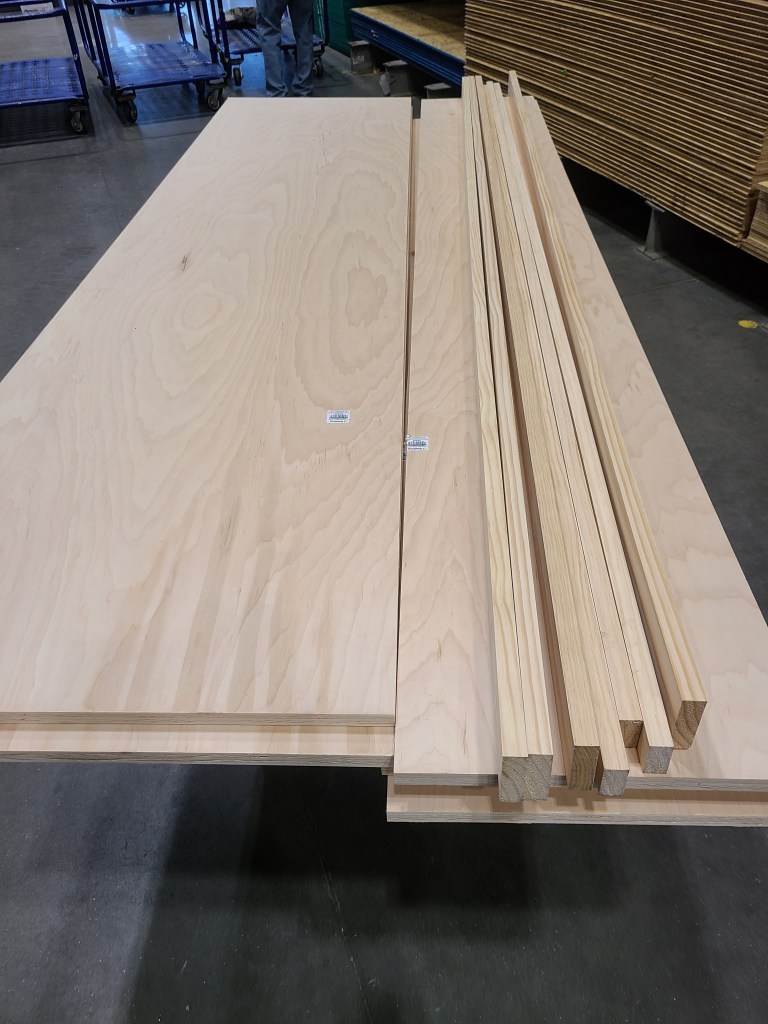
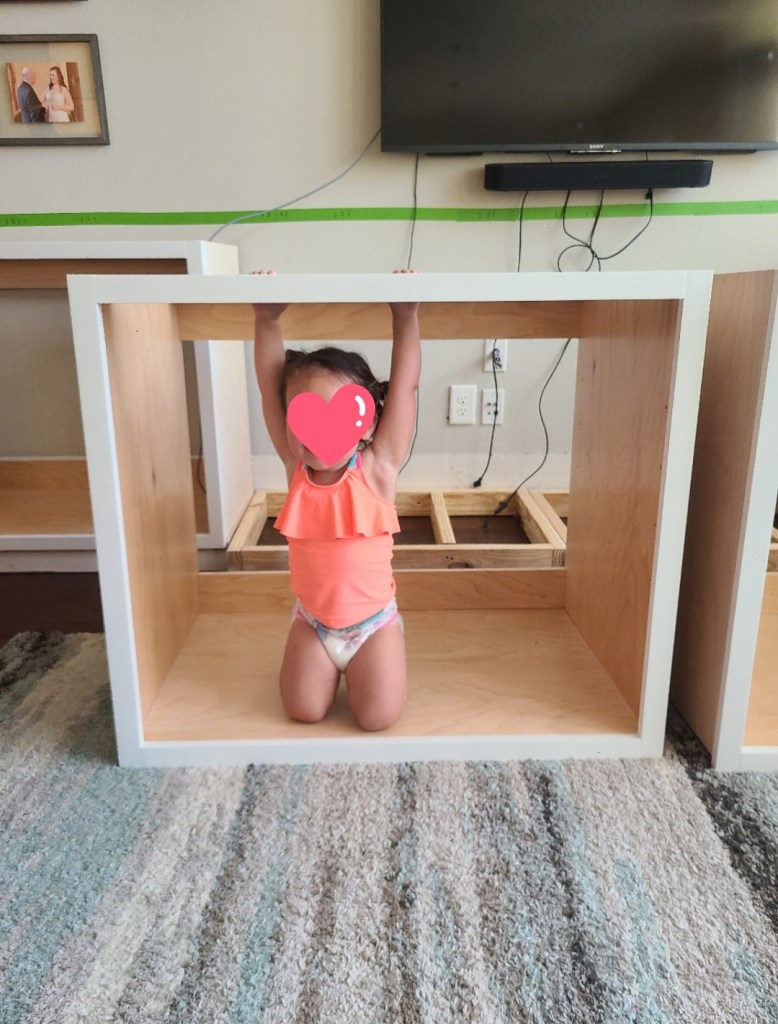
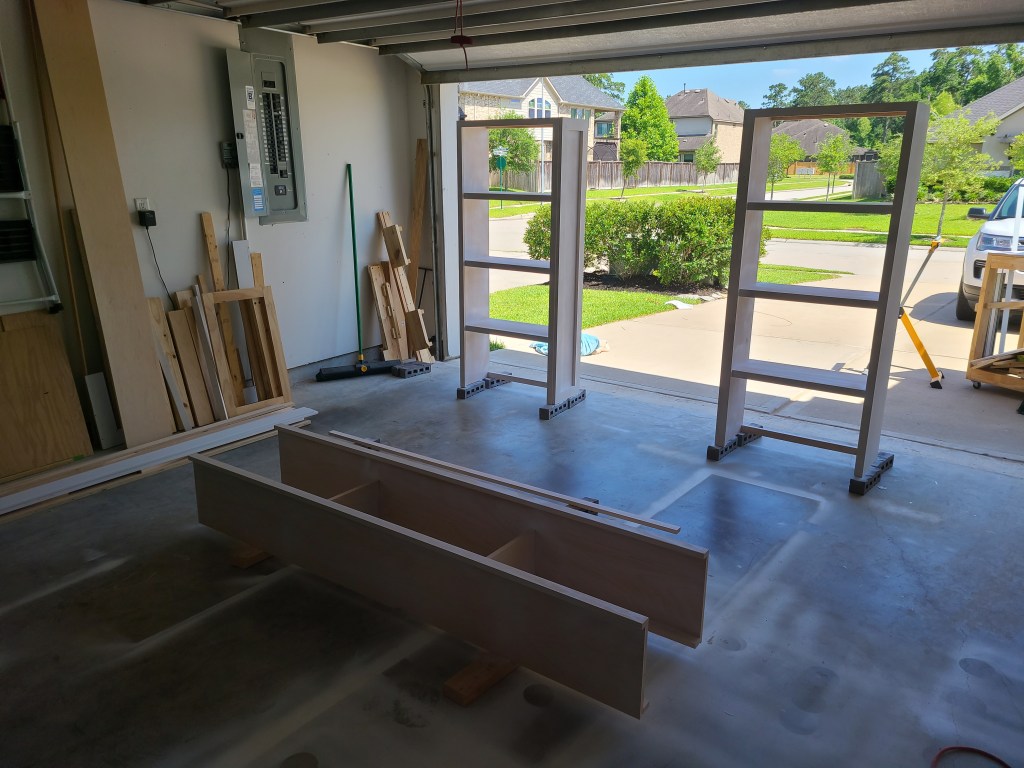
So. Much. Lumber. But so much less expensive than hiring out — if I recall correctly, we spent about $1,200 in total for supplies. Talking with friends and neighbors, we likely paid about 1/10th of what it would’ve cost to hire out. Not to downplay the sweat equity and almost 3 months of work that I put in on nights and weekends outside of my corporate job — but I am so dang proud of how they turned out. More importantly, the lessons that I taught my daughter that she still talks about make my heart swell. She was just shy of two when I was building this project, but somehow she remembers that “mommy built that! Empowering my daughter that she can do anything she works at has to be one of the coolest parts of raising her.


I was on a strict deadline to have everything installed by my daughter’s second birthday party, as we had invited our friends and family over to the house for a pool party.
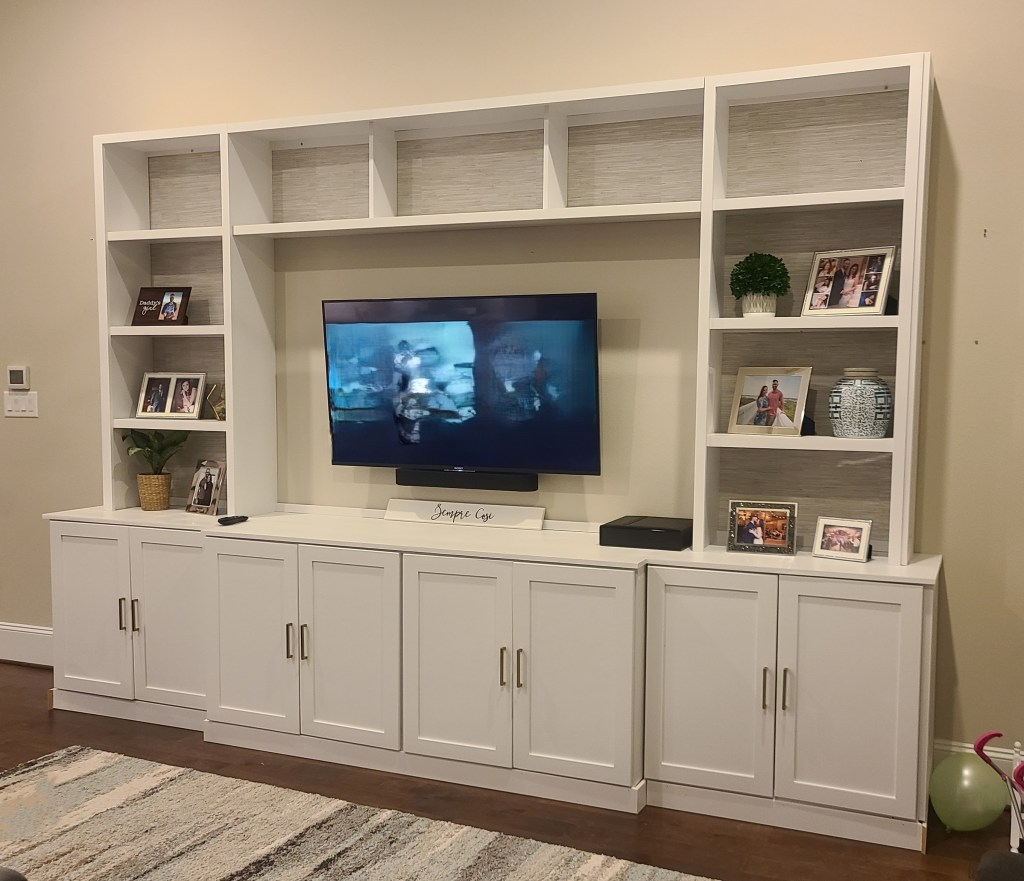

Far from styled and far from perfect, but installation happened just in the nick of time!
Things that I will go back and change (eventually):
- Switch out the countertop from painted plywood with edge banding to some type of stone (granite or quartz).
- Adjust the middle two cabinet boxes to be the same depth as the outer boxes. Initially, I thought this would create visual interest, but in execution it looks sloppy and creates a corner for kids to injure themselves and dirt to hide.
- Create toe-kicks instead of visual baseboards. The thought was to make these seem “built-in” but since it’s not encased in walls, I think it will look better from a design perspective as cabinets
- Cabinet doors converted to drawers. Not sure the placement, as I plan to leave half of the boxes as doors but the functionality of deep drawers for storage is hard to beat.
- Decorative routing on rails and stiles of doors and drawer fronts. The plain shaker style is pretty but my door building skills have come a long way since this project.
- Paint color – the white is nice and neutral but feels a little plain for a house that I’m attempting to convert from builder-grade to custom.
- Decorative trim on the cabinet end caps (placement) – I love the decorative trim, but for some reason on the bottom cabinets I made the trim flush with the face frame and on the upper shelves I left a small reveal. The upper shelves look and feel so much more professional with the reveal.
- Cabinet door hardware – I love the gold hardware but the style and placement feel off. My thought was that the handles would make the doors feel cute and accessible for my daughter. After living with them like this for a few years, they definitely call for something larger and with a little attitude (as my mom says!).
What I learned from this project:
- Installing lower cabinets requires a lot of patience — they must be level, plumb, and smushed right up next to the one next to it. There isn’t a lot of room for error here, as everything builds up from the base. A callback to the linen closet, walls are not straight!
- How to add an electrical outlet from an existing one (my husband hates exposed cords so all of our wall-mounted TV’s now have outlets behind them).
- Invest in a paint sprayer for cabinet projects – even a cheap one from Amazon will work wonders!
- Cabinet door hinges may be adjustable – check the instructions.
- When building something that uses the same measurements over and over again, use a spacer out of wood to ensure correct spacing each time instead of relying on a tape measure.
- The Power of the Project Plan – planning each step ahead of time will ensure that nothing is forgotten. This is especially helpful when planning how long a project will take.
One of my favorite parts of a project is my husband’s reaction to it and this one did not disappoint. We had so much fun styling the shelves together and even going on a shopping date to pick out a few new items to display. The amount of storage for all the things behind closed cabinet doors still makes my millennial heart oh so happy. Time for the next one!
