The laundry room in my home was the bane of my existence when we first moved in, and in the same breath, the origination of my love for building cabinets. After watching countless Instagram posts, YouTube videos, and Pinterest ideas, I was convinced I could do it. I saved up, asked for tools for birthdays and Christmas, and spent way too many hours online looking at inspiration projects. Confident in my design choices, I procured the supplies and got to work!

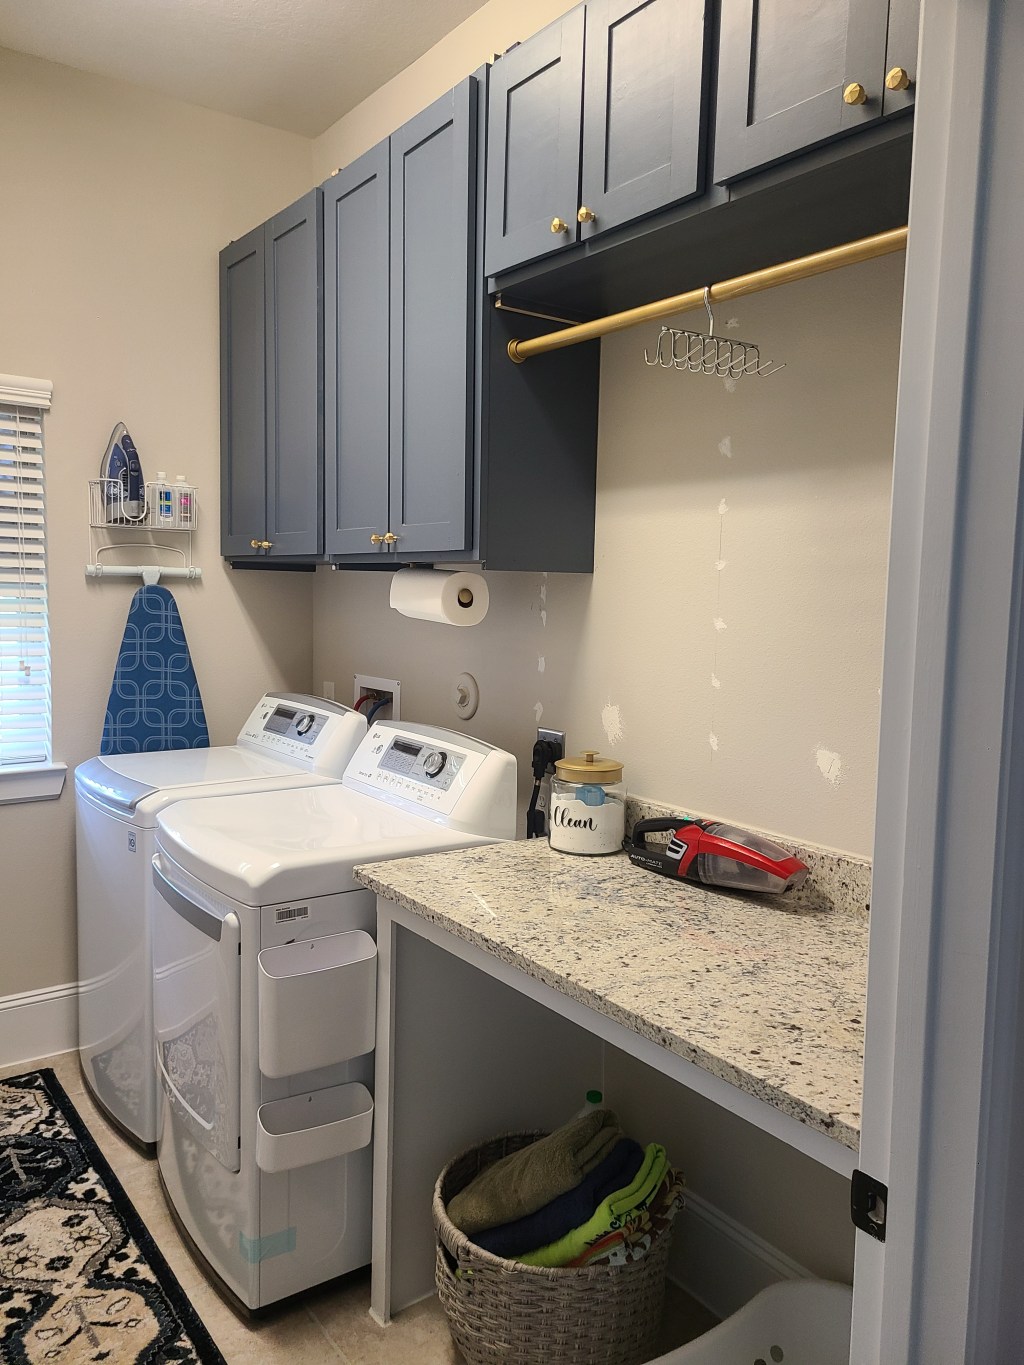
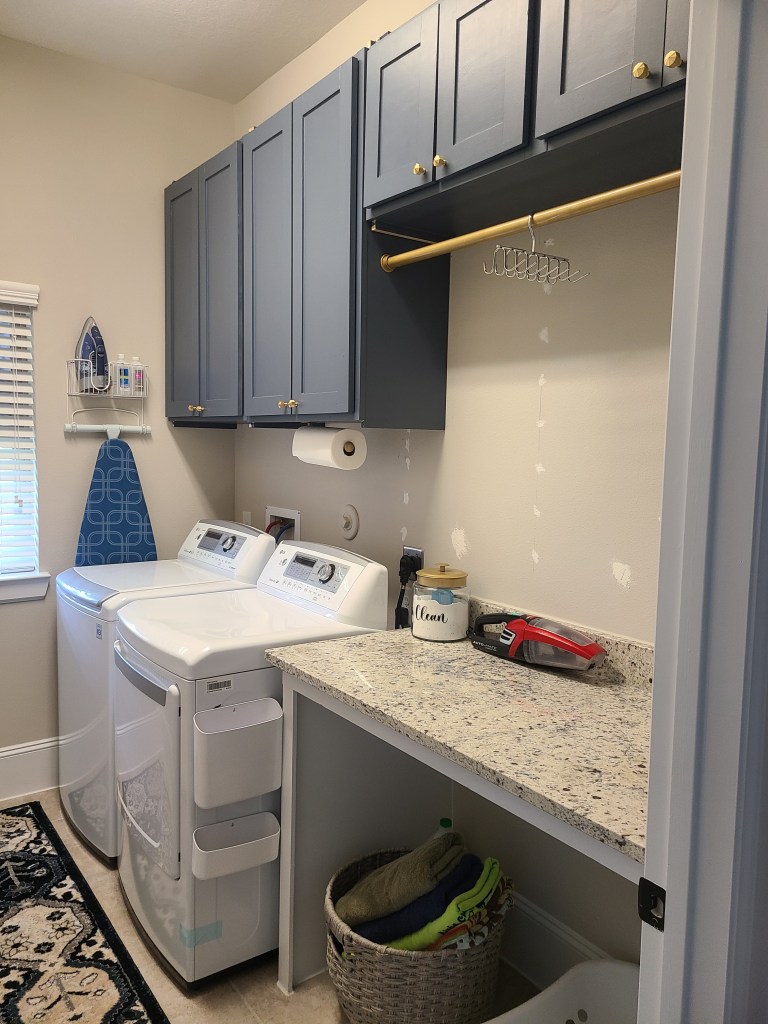
This project needed to accomplish multiple goals – create closed-door storage (laundry rooms create a lot of dust) that is aesthetically pleasing and include a small bar for clothes to hang-dry. Since this room can easily have the door closed, I used it as a way to experiment with a fun color on the cabinets, but wanted to ensure it didn’t make the room feel like a cave. Time to research paint – this is when I learned about the LRV (Light Reflective Value) of paint colors and how it affects how the room feels. LRV is a scale from 0 to 100 that determines how much light bounces off of the color and therefore impacts the feel of a space. The higher the number, the more light that is reflected. Knowing that I wanted a darker blue color for the cabinets, I researched which shade in the Sherwin-Williams paint chip deck would accomplish all my color goals – Granite Peak fit the bill perfectly!
Having never done a project like this before, I started with what seemed logical – demo. That’s how they do it on TV, right? Unfortunately, that left me with an almost unusable laundry room for the duration of time to build and install the cabinets. Considering I had never built a cabinet before, which added on a hefty amount of time to my build, this was not ideal.
Back to the fun stuff – power tools and plywood! I ripped 3/4″ birch plywood down to 12″ using my circular saw and then did cross-cuts using my miter saw for the height and width of the cabinets per the plan. I also cut 2 widths of each cabinet, in addition to the top and bottom pieces, that would be used for adjustable shelves. Lastly, two support stretchers per cabinet box were cut in the width of each cabinet box. After each of the pieces were cut and labeled, I drilled pocket holes on the top, bottom, and stretcher pieces, on the upward and wall-facing sides to keep the holes out of sight. Next, the pieces all got a good sanding using 220-grit sandpaper on an orbital sander and then thoroughly wiped down using a tack cloth to remove all the sawdust. Once cleaned up, I applied 2 thin layers of oil-based poly, lightly sanding with 220-grit in between coats. This quickly became a lesson learned, oil-based poly can turn wood yellow. Using a water-based poly will avoid the yellowing. Personally, I like to apply poly or primer and the first coat of paint before assembly. There is no right or wrong order to do paint and assembly, this is just my preference.
Using wood glue and 1-1/4″ pocket hole screws, the cabinet boxes were assembled. Being nervous about ensuring super square corners, I used an exorbitant amount of right-angle clamps and squares, but they came out perfect! This is when I realized I forgot to drill shelf pin holes down each side – a step much easier to do prior to assembly, but not impossible after the fact. After drilling 2 columns of shelf pin holes down each interior side of the cabinet boxes, I measured and cut for face frames using 1×2 select pine.
The face frames overhang the boxes slightly to create a small lip in the front to avoid Costco-sized laundry detergent from accidentally impaling me when opening and closing the cabinet doors. I cut the 1×2’s to size, drilled pocket holes, sanded, and wiped them down. I prefer to assemble face frames with wood glue and pocket hole screws prior to attaching to the cabinet carcass to ensure really tight joints that don’t pull apart over time. Once face frames were assembled, primed, and first coat painted, I attached them to the cabinet carcasses using wood glue and my 18 gauge brad nailer. Sanding after each product is applied – i.e. primer, paint, or poly – helps ensure the smoothest finish possible. Do not sand after the final coat is applied!! Fill in all the nail holes and any other imperfections, lightly sand, caulk any seams, and then finish with the final coat of paint.
Building doors is something that has always intimidated me, and each project I’ve done them slightly differently, until I landed on a way that I prefer most in terms of ease and beauty of the end product. This wasn’t that project. For this project, I used 1×3 select pine, cut to size using my miter saw, secured with pocket holes and wood glue on the ends of each rail. A channel was routed into the back of each frame and then a piece of 1/4″ plywood was placed in the channel and secured with wood glue. Ensuring the pocket hole screws didn’t go through the front of the 1×3’s was a constant losing battle – it was incredibly frustrating. Then I tried repairing the damaged pieces with wood glue and clamps, which looked about as good as it sounds. I didn’t realize that the ends of boards need to be cut off for nicer looking grain, either, so it all looks very amateur.
These learning experiences weren’t going to stop me! Every mistake that was made was a note to my future cabinet-building self, and each time my skills have improved.
I assembled the doors, gave them a good sanding, primed, caulked and painted, and then drilled for hinge holes using a jig. Since there are so many different pipes, electrical, and ductwork in the walls of laundry rooms, I invested in a Walabot to ensure I wasn’t drilling into anything expensive. I marked the studs, hung a ledger board, and then attached the cabinet boxes to the wall. Feeling really good about the whole situation, I then attached the doors to the cabinet boxes — enter immediate dread. Never having built, much less installed, cabinet doors before, I had no idea that the hinges needed adjusting. So, I thought I had made huge mistakes and couldn’t figure out how and where I went so far off the rails. I quickly learned that hinges adjust, though I can’t say that is a skill I’ve ever mastered, it’s all trial and error so far. Once the doors were on, I got to do my favorite part of every cabinet project which is attaching the knobs. It’s like getting all made up to go out to a fancy party and then putting on the earrings that make the whole outfit come together.
Other items were added to make the room as functional as possible for our family, but the major work was done after cabinets were built and installed. My husband was a trooper being so calm while the back part of the house was a disaster during construction and then we always have fun putting the space back together as a team. Smaller items that made the room feel more cozy and warm were a new runner rug, a jar dedicated to Oxi Clean (IYKYK), a basket for all of our summer items (pool towels, sunscreen, etc.), and a cute magnetized bin to live on the dryer for lint.
Things that I will go back and change (eventually):
- Cabinet construction: I overthought this process and left a 1″ lip at the bottom and top of each side of the cabinets because I was planning to come back and add trim. Trim would’ve looked very odd in this application and I never went back and added it and those little nubs stare at me every time I change a load of laundry.
- Overall design: half of the cabinets are 42″ tall and the others are much shorter and hung higher to accommodate the hanging rod. The only part of the hanging rod used on a regular basis is the hook hanger that I use to hang dry my delicates which takes up about 4″ horizontally. The rest of the rod stores extra hangers that can easily be kept elsewhere and another tall cabinet installed in the same place which would add more much-needed storage.
- Finishes: I love the blue paint color and the cabinet knobs, but that yellow wood from the oil-based poly gives me the ick. Additionally, I will use harder wood for the doors to ensure they don’t warp over time.
- Not necessarily something I would change, but in the future I want to add:
- A utility sink (this would be something hired out as a hole would need to be cut in the existing granite countertop)
- Tile the wall behind the washer and dryer
- In between stud storage for various cleaning tools – stick vacuum, brooms, dusters, etc.
- Some type of shelf / stand / drawer situation underneath the dryer to elevate it and provide a bit more storage underneath for either laundry baskets or extra supplies. My husband and I are both tall and my back already hurts from changing the laundry from the top-loader washer to the front-load dryer and aging is only making things harder!
What I learned from this project:
- Keep it simple while you’re learning – no matter how many YouTube videos you watch
- Oil-based poly turns wood yellow
- Demo should be the last step before installation, not the first step before measuring
All in all, I’m extremely proud of the final result of this project! It solved the problems I set out to solve and gave me confidence that I can make my home exactly what I want it to be – MISSION ACCOMPLISHED!
